Sunday, May 30, 2010

The Montessori Way

A friend of mine recently introduced me to the Montessori methods of teaching, and between talking to her, visiting one of their schools, and flipping through a book about their philosophy, I became inspired to make my art materials more accessible to my kids. We have a large desk in the nursery that previously had been holding baby books, photo albums, etc, but I converted it into an art desk for Rebecca, complete with crayons, markers, colored pencils, many different scissors, tape, construction paper, stickers and stamps. The above picture looks a bit cluttered, which I will have to work on since a nice clear table space is sure to inspire the creative process more than a cluttered one, but you get the idea. When I surprised Rebecca with the assembled art desk, she got so excited she set to work almost immediately. The following pictures show what she came up with. At top is a pop-up book, the middle is a purse, and at bottom is a dolphin.
For Elliot I made room for a little table and chairs that we purchased from Ikea a couple of years back, which I set beside our drawing easel. As Elliot is demonstrating in the below picture, the easel can also be used for hiding things! Of course I should have known that once Elliot saw Rebecca at the big desk, she too would want to sit on the big chair, so she too gets her chance to make use of the new desk.

Coloring

This last week's project was to experiment coloring on different kinds of paper. First we took out the crayons and the markers. Then I gave the girls each a coffee filter, a paper napkin, a piece of newspaper, and a paper plate, and I let them have at it. Rebecca immediately noticed how difficult it is to color on a paper napkin as she had to hold it against the table with her arm to keep it steady enough to color on. Elliot seemed to enjoy using markers on the paper napkin, which resulted in textured colorings. Come to think of it she liked using markers on every surface instead of crayons as I think there is something about having to pop the lid on and off of the marker during the coloring process that makes markers much more interesting than crayons. The experiment with different paper surfaces gave Rebecca the idea to try coloring on the non-sticky side of scotch tape as well, which she found made her strokes much more fluid-looking, though less brilliant.


There is definitely a huge difference between a three-year-old's colorings and a one-year-old's colorings. Rebecca uses very controlled, deliberate lines (unless she is in a hurry), and Elliot's marks are always the same half-rainbow curve that she makes back and forth, back and forth, and which she repeats several times before switching to another color. While we have plenty of coloring books for the girls to decorate, I try to offer them plain paper more often than coloring pages as I understand it is better for children to experiment on their own when they are learning to draw. I've even heard that it isn't a good idea to demonstrate how to draw as it will give children the false assumption that there is one correct way to draw and will make their own scribblings seem inferior. I will often put a few scribbles on the page to get them started and then encourage them to fill the page with color in their own way. When it comes to drawing actual objects, the goal should be to encourage children to draw things the way they see them, not to show them what they should be seeing.

Wednesday, May 26, 2010

Veggie Stamps

For last week's project we used assorted fruits and vegetables as stamps. I gave each girl a large piece of construction paper and a couple of jumbo-sized stamp pads (washable and non-toxic of course), and I set a bunch of different fruits and vegetables out for them to stamp with. The produce was pre-cut, most often using cross sections, so the girls would have a flat surface to press into the stamp pads.

Rebecca decided she only wanted to use the red stamp pad (red is her favorite color as she will inform you several times a day), but Elliot experimented with several different colors. We used corn on the cob, mushrooms, onions, eggplant, lemons, cauliflower, green bell peppers, and an apple. The onions, cauliflower and lemons made the most interesting prints, though the eggplant was the easiest for Elliot to keep ahold of and stamp with again and again. The only problem with giving food to a one-year-old for use in an art project is that she is likely to try and eat it. Corn on the cob is a recent favorite of Elliot's, and she found it impossible to pass up, even uncooked!

Thursday, May 13, 2010

Blueprints

For our next project we (or rather I) decided to make use of all this sun we've been enjoying lately and see what happens when the sun bleaches colored construction paper. The girls and I gathered various objects from around the house, including toys, forks, a cheese grater, etc, and we taped the objects onto sheets of blue and black construction paper. Then we placed them out in a location that was sure to receive lots of sun for several hours at a time. Then we waited. Normally the waiting would be difficult for a three-year-old and a one-year-old, but we had story time, lunch and naps to keep us plenty busy while we let the sun do its work. When the girls woke up from their naps we retrieved our papers, gently peeled the objects and the tape from them, and marveled over the result. The black construction paper remained unchanged while the blue paper had been altered to a much lighter shade of blue except for the areas of the page that had been covered by the objects we taped down. The objects left "blueprints" of themselves on the papers, some more distinct than others. We found that the objects that didn't stand too high off the ground and that easily laid flat, such as the small cheese grater, made better "blueprints" than the tall objects. Now that we know which objects work best we can try this again with greater success. We also found that it is helpful to secure the pages to the ground as even the slightest breeze will flip the paper and rend the experiment useless.


Monday, May 10, 2010

Paper Maché

This project is something I haven't done in a very long time.
It was inspired by a costume request for a three-year-old's birthday party we attended last weekend. The invitation instructed the invitees to come dressed as a favorite superhero. Because Rebecca has very little knowledge of superheroes, we decided to dress her as someone she could relate to: Skippyjon Jones. If you're unfamiliar with Skippyjon, he is a character from a line of children's books that are wonderfully illustrated and quite hilarious. Skippyjon is a siamese cat who thinks he is a chihuahua and who often finds himself daydreaming himself into all sorts of adventures. During these adventures he wears a mask and cape and plays the role of the superhero. Perfect! A mask and cape are easy enough to pull together, but what about a giant pair of ears? That's where the paper maché comes in.

I mixed up a batch of paper maché from flour, water, and a pinch of salt, laid out a sheet to protect my recently cleaned tile floors, cut a bunch of strips of newspaper, and gathered a few recyclables (plus a couple of balloons) for the girls to paper maché. For the two kitty ears I cut the corners of a toothpaste box and plastered them with the machéd newspaper strips. Elliot mostly just played in the goo, while Rebecca set to covering her balloon with machéd strips. She didn't quite grasp the concept of wringing the newpaper strips out before applying them to her balloon, so she ended up with a thick coat of the paper maché that oozed and dripped all over the sheet. Both girls were barefoot (they probably should've been naked, or at least in bathing suits) and whenever they would step in globs of the flour-water mixture they would cry out. I suppose I should be thankful that they disliked the feeling of the paper-maché on their feet because the cleanup really wasn't too bad! Thankfully my husband was home and was able to get the bathwater started just before Rebecca broke down about all the drips she was covered in (she dislikes dripping water on herself, let alone a white, runny mess)!

After the paper maché dried we painted the ears to look like Skippyjon's ears and glued them to a headband. The top picture is the result. Rebecca was pretty proud of her costume and begged to keep her face paint on for the rest of the day.

Thursday, May 6, 2010

Watercolors

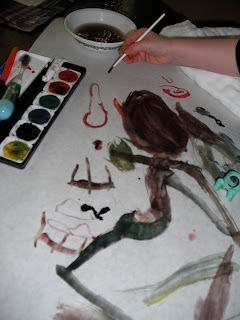
Realizing that Elliot hasn't had the chance to use watercolors yet, we pulled out the paint brushes and the butcher paper and completed our next art adventure. We have a large assortment of brushes, from the standard watercolor brushes to foam brushes of different shapes, even old toothbrushes! Rebecca enjoyed experimenting with the different brushes, and she got really excited when I told her she could write letters using a paint brush. Who knew such a concept could be so awe-inspiring? As usual, Elliot mostly enjoyed experimenting with the water and the other supplies. Neither girl wore a painting smock; what was I thinking? Now I just need to find a couple of frames to showcase their paintings!

Wednesday, May 5, 2010

Happy Earth Day

This next project was inspired by Earth Day. It was also inspired by our need for place mats on our dining room table! Out in front of our house we have a circle of wildflowers surrounding a large deciduous tree. The girls and I went out and picked flowers, leaves, grasses, as well as a few roses from Grandpa's bountiful back yard, and we set to work pulling the petals off of the flowers for our project. I laid out place mat sized pieces of clear contact paper in front of each kid (sticky side up), and they set about pressing all the organic materials onto the contact paper in their own unique designs. Elliot seemed to prefer to place all of her petals and leaves in one of the four corners of the contact paper, so I helped her spread them out, keeping in mind how these might look on our table. After the contact paper was thoroughly covered, I placed another piece on top of the collage (sticky side down) and pressed the two sheets together. I trimmed around the edges with a pair of fancy scissors, and now we have two new place mats to keep our table clean! As we did this project a couple of weeks ago, the petals have been turning various shades of brown, which has provided us a teaching tool to use with our kids. While we probably won't use them forever, they at least keep something decorative on the table while the flowers we are pressing are ready for use!